RecoverPoint for VMs protects a crucial database VM which requires application consistent point-in-time every day as part of SLA compliance. We are going to see how to leverage the KVSS to create application consistent bookmarks.
Log into vSphere web client and navigate to Hosts and Clusters.
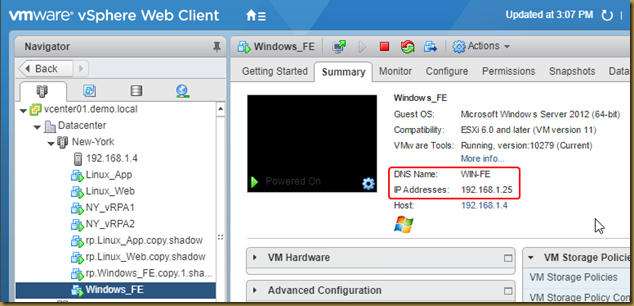
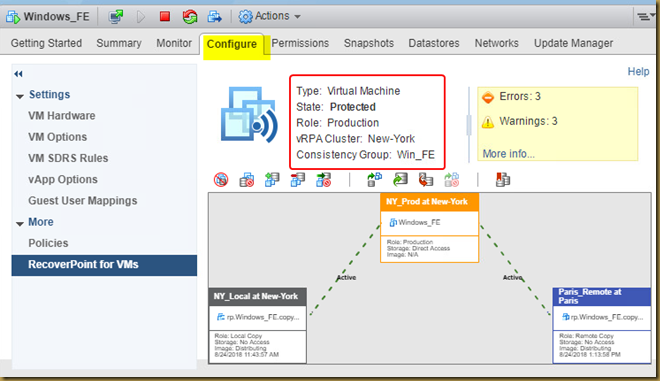
We have replicated Windows Web DB VM beforehand, and we locate it under the name Windows_FE.
Open the Console Window. Login to Windows_FE server.
KVSS - KVSS is free utility which is bundled with every RP4VMs release, it allows to create application consistent bookmarks for Microsoft SQL Server and Exchange. As part of the KVSS installation, a VSS provider is installed which allows KVSS to quiesce the DB and send a bookmark creation request to RP4VMs.
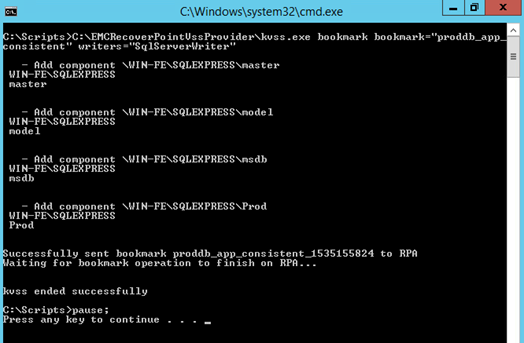
Execute the KVSS_DB_Bookmark.bat script by double clicking on it. The script would create an application consistent bookmark called proddb_app_consistent for the MSSQL installed on this VM.
As you can see, KVSS ended successfully and an application consistent bookmark was created successfully as well. Press any key at the command prompt and return to the vCenter Web Client.
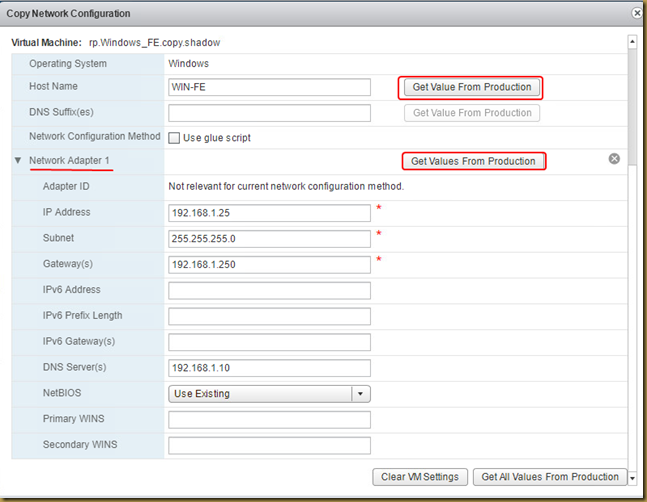
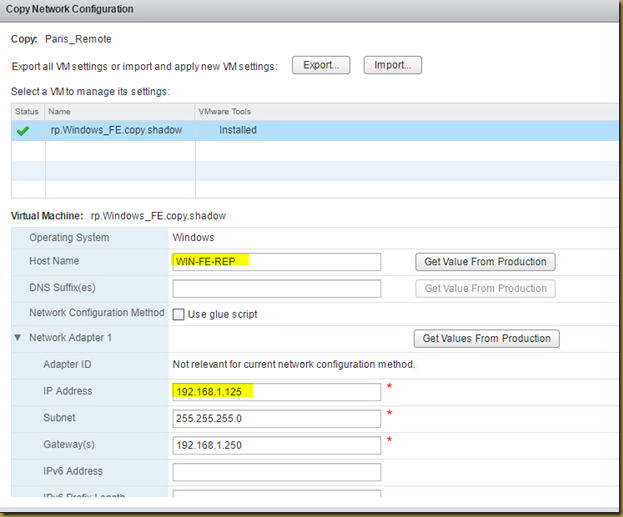
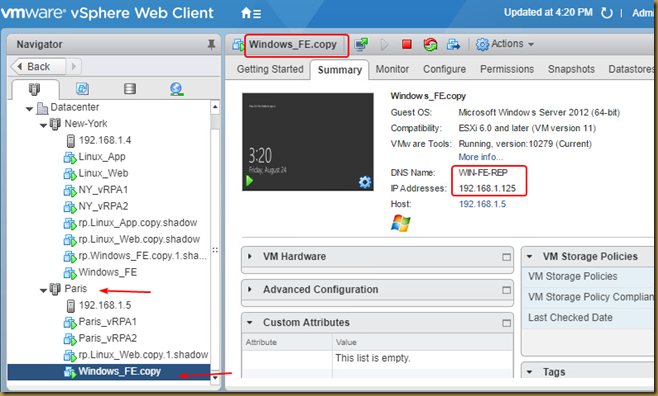
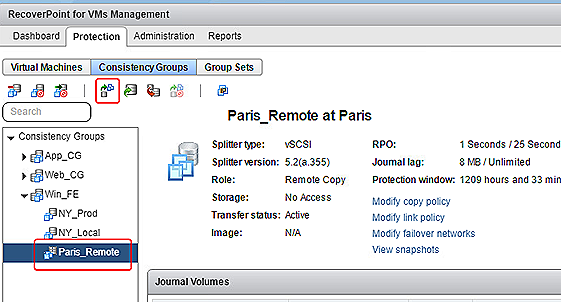
Now, let's perform a test to see the IP configuration is changing on the replica VM. For that purpose, Click on the Test Copy button.
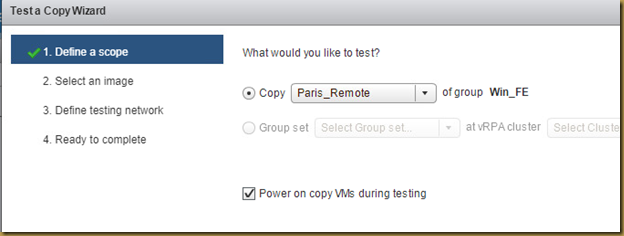
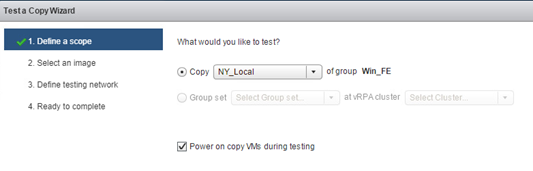
Select NY_Local under copy. Leave the option to Power on copy VMs during testing enabled as we want the replica VM to power on automatically.
Click Next.
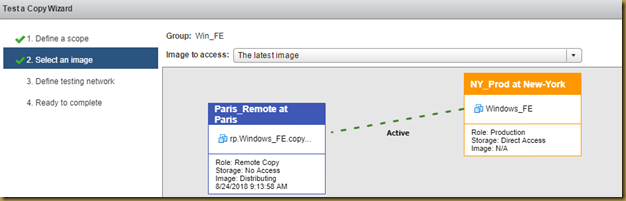
Select An image from the image list and click Next.
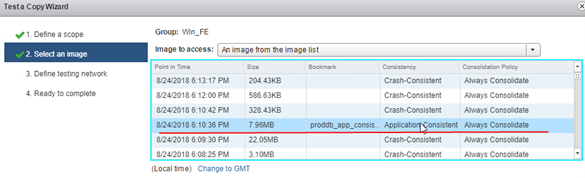
Scroll down until you see an application consistent bookmark and select it. Click Next to continue.
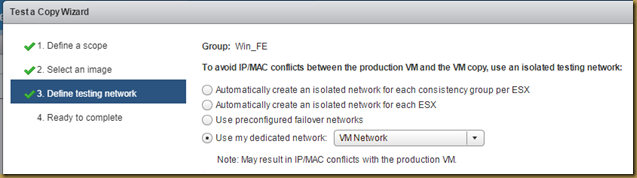
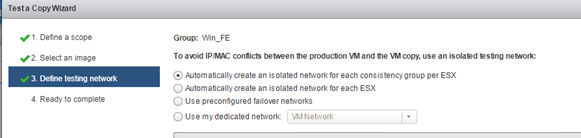
Keep the default of Automatically create an isolated network for each consistency group per ESX. Click Next to continue.
Click on Yes to enable image access.
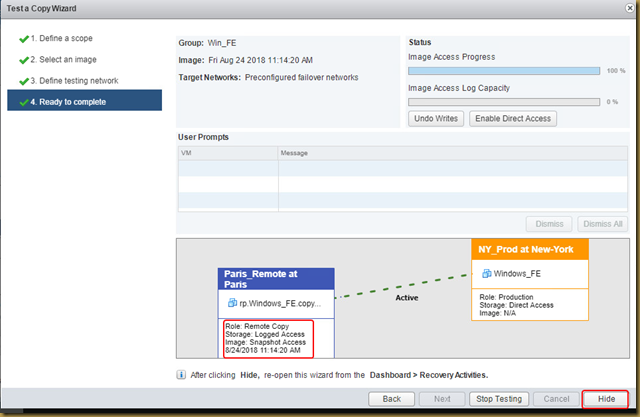
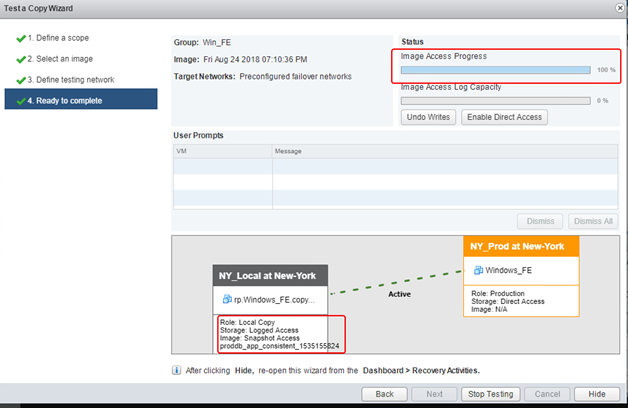
Once the Image Access Progress reaches 100% and the storage status is Logged Access, Image access has been enabled. Also see that the accessed bookmark is indeed the application consistent bookmark we created using KVSS earlier.
Click Stop Testing to finish testing or Hide to close the wizard and checkout the DB status on the replica VM.
Click Yes to stop testing.
We successfully leveraged KVSS (a RP4VMs utility) to create an application-consistent bookmark of our MSSQL DB.
Creating application-consistent bookmarks:
KVSS bookmarks are created using the kvss.exe bookmark command.
The working folder for running KVSS commands is %SystemDriver%/EMCRecoverPointVSSProvider/
When using KVSS to apply bookmarks:
The syntax is as follows:
kvss.exe bookmark
bookmark=bookmark_name
writers=writer_name writer_name
[groups=group_name group_name]
[consolidation_policy=never|survive_daily|survive_weekly|
survive_monthly|always]
[type=[FULL|COPY]]
[ip=RecoverPoint_cluster_management_ip_address]
[user=RecoverPoint_username]
[password=RecoverPoint password]
KVSS_DB_Bookmark.Bat:
C:\EMCRecoverPointVssProvider\kvss.exe bookmark bookmark=”YOUR_BOOKMARK_NAME” writers=”SqlServerWriter”
pause;
>>>>>>>>>>>>>>>>>>>>>>>>>>>>>>>>>>>>>>>>>>>>>>>>>>>>>>>>>>>>>>>>>>>>>>>>>>>>>>>>>>>>>>>>>>>>>>>>>>>>>>
CONCLUSION:
RecoverPoint for VMs offers the ultimate Virtual Machine protection using a completely virtualized solution that's storage agnostic and is managed using the RecoverPoint for VMs plugin for vCenter vSphere Web Client. RecoverPoint for VMs offers many supported topologies to meet various business requirements and allow users to protect VMs locally and/or remotely from within the vSphere client.
Log into vSphere web client and navigate to Hosts and Clusters.
We have replicated Windows Web DB VM beforehand, and we locate it under the name Windows_FE.
Open the Console Window. Login to Windows_FE server.
KVSS - KVSS is free utility which is bundled with every RP4VMs release, it allows to create application consistent bookmarks for Microsoft SQL Server and Exchange. As part of the KVSS installation, a VSS provider is installed which allows KVSS to quiesce the DB and send a bookmark creation request to RP4VMs.
Execute the KVSS_DB_Bookmark.bat script by double clicking on it. The script would create an application consistent bookmark called proddb_app_consistent for the MSSQL installed on this VM.
As you can see, KVSS ended successfully and an application consistent bookmark was created successfully as well. Press any key at the command prompt and return to the vCenter Web Client.
Now, let's perform a test to see the IP configuration is changing on the replica VM. For that purpose, Click on the Test Copy button.
Select NY_Local under copy. Leave the option to Power on copy VMs during testing enabled as we want the replica VM to power on automatically.
Click Next.
Select An image from the image list and click Next.
Scroll down until you see an application consistent bookmark and select it. Click Next to continue.
Keep the default of Automatically create an isolated network for each consistency group per ESX. Click Next to continue.
Click on Yes to enable image access.
Once the Image Access Progress reaches 100% and the storage status is Logged Access, Image access has been enabled. Also see that the accessed bookmark is indeed the application consistent bookmark we created using KVSS earlier.
Click Stop Testing to finish testing or Hide to close the wizard and checkout the DB status on the replica VM.
Click Yes to stop testing.
We successfully leveraged KVSS (a RP4VMs utility) to create an application-consistent bookmark of our MSSQL DB.
Creating application-consistent bookmarks:
KVSS bookmarks are created using the kvss.exe bookmark command.
The working folder for running KVSS commands is %SystemDriver%/EMCRecoverPointVSSProvider/
When using KVSS to apply bookmarks:
- Surround parameter values with quotation marks.
- You can use the vssadmin list writers command to obtain a list of registered writers on the host virtual machine.
- You can use the kvss.exe list command to display the components of each of the writers found using the vssadmin list writers command.
- You can run the kvss.exe set_credentials command once per Windows user to define the ip, user, and password. After doing so, you will not need to type these values again.
- If they are separated by a space, you can type multiple writers and groups simultaneously.
- Only the application on which KVSS is run is application consistent, and only when run on the same virtual machine. Best practice is to name the bookmark to contain both the name of the application and the virtual machine.
- Upgrade the vRPA clusters before upgrading KVSS. An older version of KVSS works with a vRPA cluster running a newer version of RecoverPoint for VMs. A newer version of KVSS does not work with a vRPA cluster running an older version of RecoverPoint for VMs.
The syntax is as follows:
kvss.exe bookmark
bookmark=bookmark_name
writers=writer_name writer_name
[groups=group_name group_name]
[consolidation_policy=never|survive_daily|survive_weekly|
survive_monthly|always]
[type=[FULL|COPY]]
[ip=RecoverPoint_cluster_management_ip_address]
[user=RecoverPoint_username]
[password=RecoverPoint password]
KVSS_DB_Bookmark.Bat:
C:\EMCRecoverPointVssProvider\kvss.exe bookmark bookmark=”YOUR_BOOKMARK_NAME” writers=”SqlServerWriter”
pause;
>>>>>>>>>>>>>>>>>>>>>>>>>>>>>>>>>>>>>>>>>>>>>>>>>>>>>>>>>>>>>>>>>>>>>>>>>>>>>>>>>>>>>>>>>>>>>>>>>>>>>>
CONCLUSION:
RecoverPoint for VMs offers the ultimate Virtual Machine protection using a completely virtualized solution that's storage agnostic and is managed using the RecoverPoint for VMs plugin for vCenter vSphere Web Client. RecoverPoint for VMs offers many supported topologies to meet various business requirements and allow users to protect VMs locally and/or remotely from within the vSphere client.